
DISCLOSURE: I received this product complimentary from Smile Brilliant in exchange for a review of their product. As always, all content and opinions are entirely my own and 100% honest. I would never recommend or review something I wouldn’t personally use or buy myself.
When I was contacted by Smile Brilliant to try their teeth whitening kit, I was over the moon to try it. I for one am always not comfortable with my smile for a number of reasons. Them being an off yellow tint would be one of the major things that bug me about my smile, I don’t like to smile often because of it.
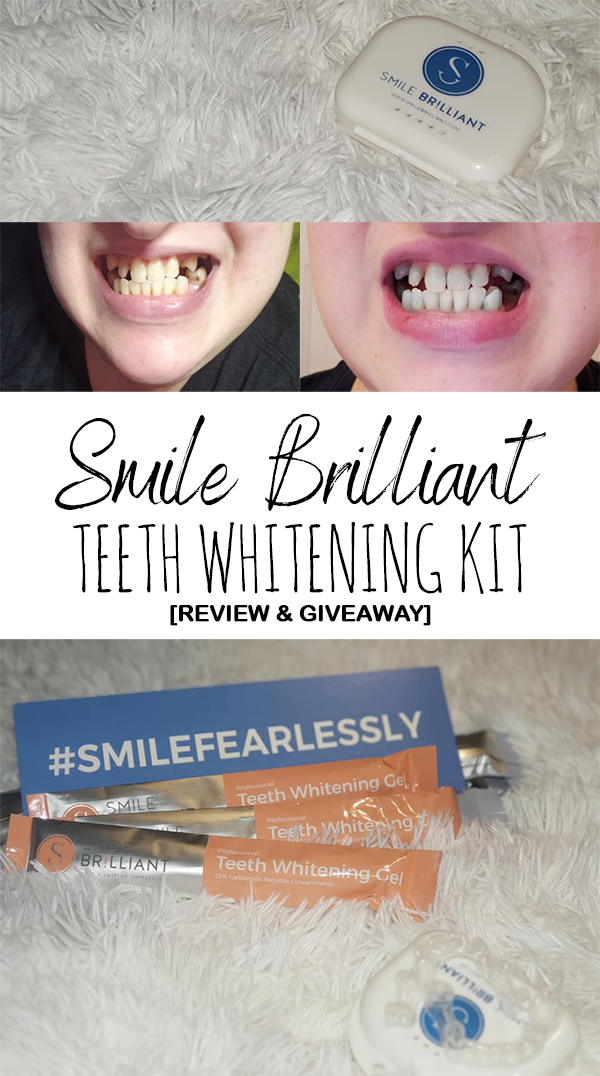
I have tried my share of teeth whitening stripes before and they just didn’t work for me at all. So I pretty much gave up until Smile Brilliant reached out to me. Their teeth whitening kit only cost the value of $149, which isn’t as bad as other programs that can cost you well over $400.
How does Smile Brilliant work?
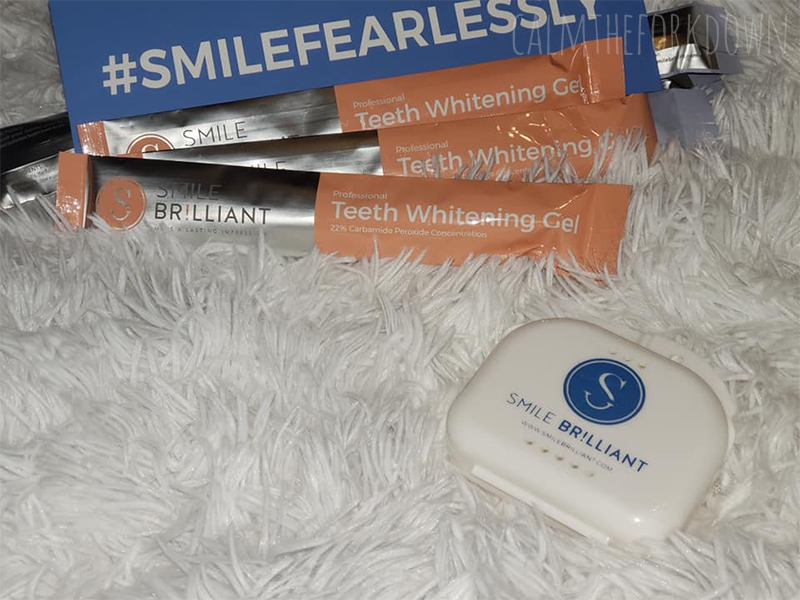
The kit contains everything you will need material wise to make the teeth impressions. The kit includes: Base and Catalyst Paste to make your impressions, as well as teeth whitening gels and teeth desensitizing gels. You will also receive detailed instructions for making your impressions as well as tips for whitening.
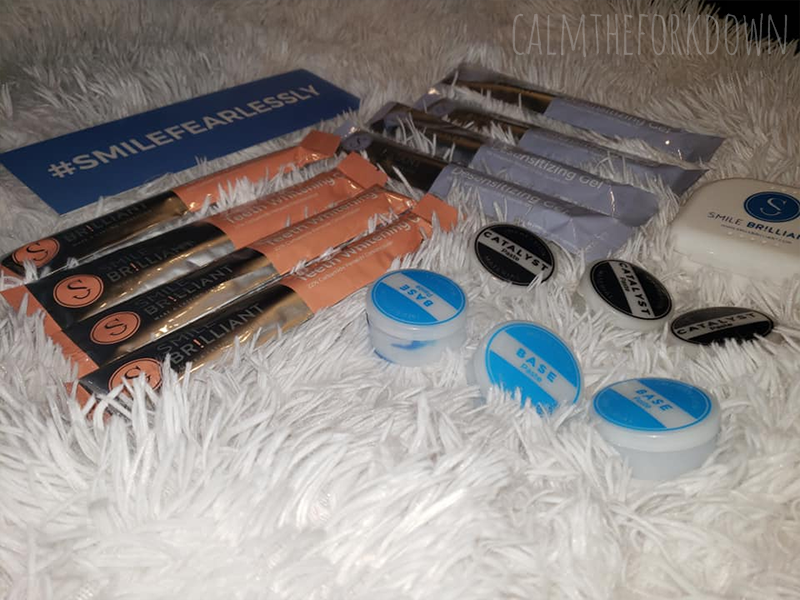
This is the part where you have to pay attention to what you are doing, because if you don’t do it right, you will mess up the clay for the impressions. Now they send a backup in case you mess it up. Mix the Base and Catalyst paste completely until they are blended and no white streaks remain. But don’t mix too long though otherwise the mixture will harden and you won’t be able to bite down and make the impression.
Fill the retainer with the mixture and then bite down on them. Leave them in your mouth for a minimum of two minutes and once they are hardened you can pop them out. Once you have finished your impressions, wait 30 minutes for them to harden and then mail them back in the included pre-paid shipping envelope. You then send the trays back to Smile Brilliant and a few weeks later you will receive your impressions in the mail and you can start whitening your teeth.

The Whitening Process
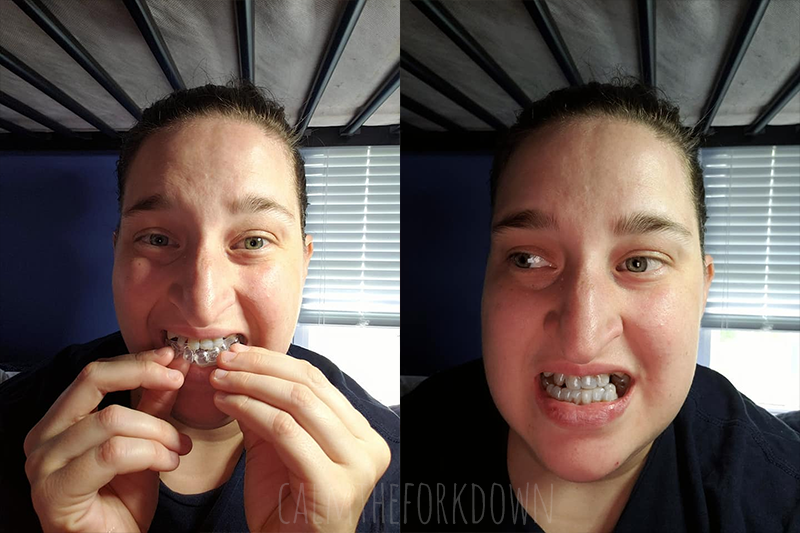
Once you get your custom fitted trays in the mail, you will be able to whiten your teeth. First thing you need to do is read over the papers that came with the kit, they’re really important. Just add a thing even layer of the whitening gel into the trays and press them onto your teeth. Smile Brilliant recommends you wearing them for 45 minutes to 3 hours at a time. The first time I tried doing it for 45 minutes, but to my surprise my teeth feel totally fine. I turned on some Netflix to make the time go by faster.
After you use the whitening gel, you can apply the desensitizing gel the same way you applied the whitening gel, except you only do it for 15-20 minutes. It’s that easy. My favorite part about the whole experience is how easy the whole process is and how amazing your teeth look afterwards. Just one syringe of the whitening gel (each syringe gets you 3-4 whitening session. I was sent 4 syringes of each kind, and I’ve just did 4 sessions so far and you can really tell the difference.
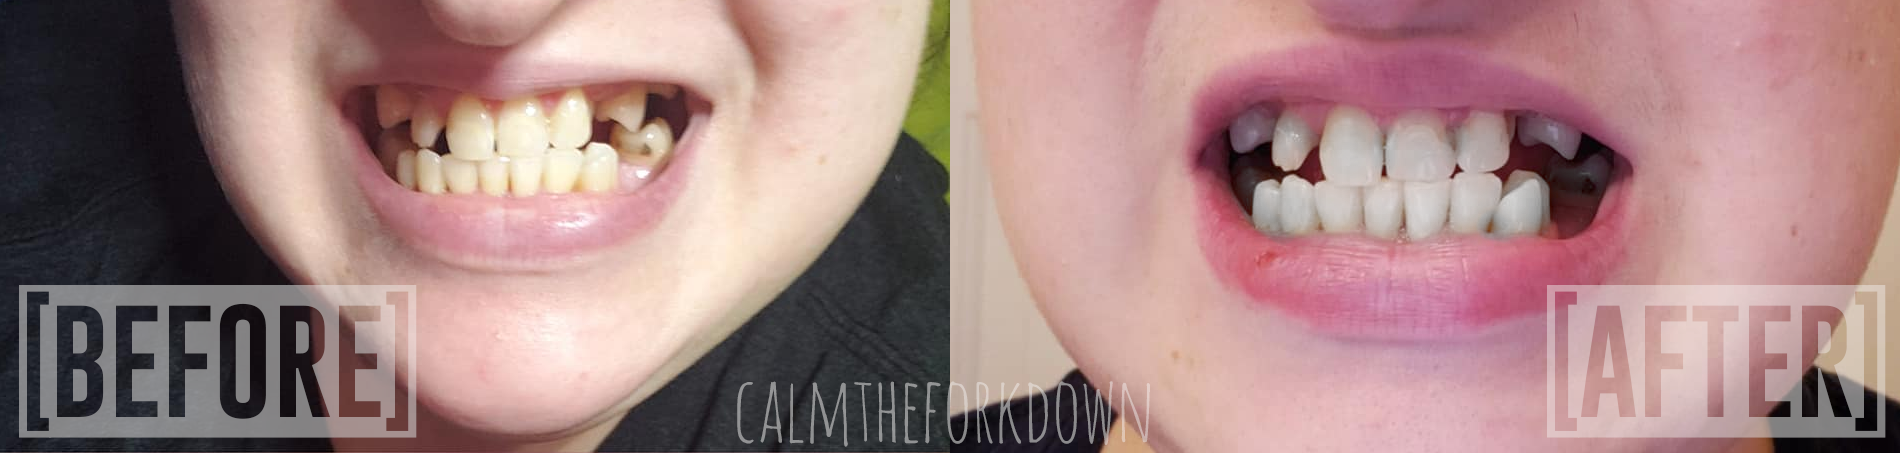
My Results: Before & After
Want to give Smile Brilliant a try for yourself?
The team was kind enough to sponsor this giveaway for ONE lucky reader to receive their own teeth whitening kit!
The giveaway is for $149 credit and is open to USA, UK, Canada, and Australia. Good luck!
Don’t worry if you don’t win – I’ve got a coupon code just for the CTFD fam 🙂
Use my code: calmtheforkdown15 for 15% off your entire order
This is amazing! It’s great to see how well this works!!
Amazing results!
I could really use a whitening to brighten my smile. THis looks easy to use at home.
I have been wanting to whiten my teeth. This is amazing.
I cannot wait to try these!
Wow – an amazing difference. Thanks for showing us.
My teeth need this!
I have been looking for something like this! Thanks for the giveaway
I love the results! I would love to have my teeth look this white.
Looks like it works pretty good. I’d like to try this out.
I have whitened my teeth in the past and it made them so sensitive. This looks like a better product.
This sounds like a great whitening kit. I drink so much black coffee and tea and this would be great.
I am impressed!
Wow i’ve never seen anything like this before the results are amazing
It sounds great.
I like how the lab creates the trays after you order the system.
This teeth whitening kit looks very nice. Thanks for sharing!
Affordable product with amazing results!
This product seems to do a great job. You only need a bottle of hydrogen peroxide, though, to whiten teeth. That is the active ingredient in these products. Just rinse with it for a few days and you’re teeth will be whiter than white. Thanks for posting!
I agree – this is a comparatively inexpensive but extremely effective system. I’m really impressed by your results.
Some family members have been looking to whiten their teeth,. Thank you for the suggestion and the demo with the pictures.
You really CAN tell the difference! It’s great to see this review and the before and after photos.
That is a big difference. I am impressed on how well this works!